Saxophone & Clarinet Lessons 503.888.5796
How To Play The Clarinet Part 1
Play your first note in this simple yet often overlooked way to begin learning how to play clarinet.
This is the first in a four-part series on how to play the clarinet. These 4 mini-lessons cover the following important information:
1. Parts of the clarinet, the reed, playing on the mouthpiece and barrel combo, the embouchure, breath support, and reed care
2. Embouchure review, lip push-ups, tonguing, mouthpiece/barrel combo, mouthpiece only, blowing F# and high C
3. The rest of the clarinet pieces, how to assemble, how to hold, clarinet push-ups, cleaning and storing
4. First notes on the completely-assembled clarinet, finger positions, how to read fingering charts, clarinet accessories (swab, cotton cloth, reed guard, cork grease)
All The Mini Lessons: How to Play the Clarinet Part 1 • How to Play the Clarinet Part 2 • How to Play the Clarinet Part 3 • How to Play the Clarinet Part 4
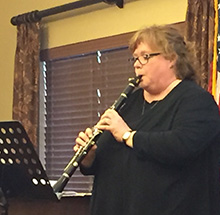
Stress is reduced by learning to play clarinet
Mary Ellen is a knowledgeable clarinet teacher with a great sense of humor. I look forward to coming to my lessons and to practicing.
I wasn’t playing the clarinet before I started learning with Mary Ellen. Being able to play the clarinet has reduced the stress in my life as an ER Nurse.
Music brings joy to my life and being able to play the clarinet in addition to listening to music has added so much joy. – – Deborah Hoff
 Stress is reduced by learning to play clarinet
Mini Lesson #1 How to Play the Clarinet: Playing the Mouthpiece and Barrel
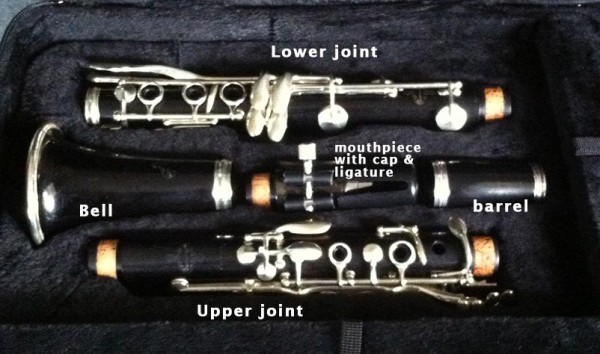
1. Learn the Parts
There are 5 main pieces of the clarinet. Starting from the bottom, they are: the bell, the lower joint, the upper joint, the barrel, and the mouthpiece.
The bell is shaped like a bell. And for that matter, the barrel is shaped like a barrel. Is there an easy way to tell the upper and lower joints apart? Yes! The upper joint has a ring of cork on each end. The lower joint only has one ring of cork at the bottom.
Look at the image above. Match up each part in the photo with the corresponding part in your clarinet case.
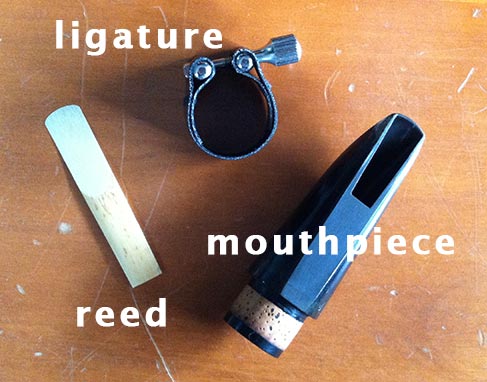
2. Mouthpiece is a Special Case
The mouthpiece has two other pieces that get attached to it: the ligature and the reed. The ligature is a metal or leather device that holds the reed onto the mouthpiece and allows the reed to vibrate freely.
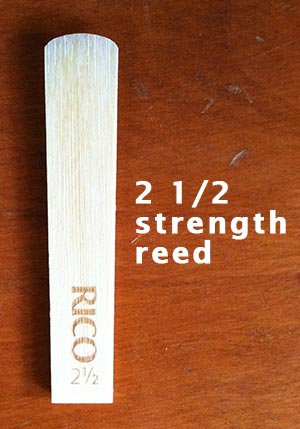
3. Speaking of the Reed
To produce a sound on the clarinet, you need a reed. When learning how to play clarinet, you should start with a #2 reed. The number indicates its thickness and strength. Reeds range in strength from #1 to #5, in half or quarter increments.
For example, you might start on a #2 reed, but after playing for a few months, you will find that with your mouth muscles developing strength, you can play on a stronger reed – a #2½ or even a #2 3/4.
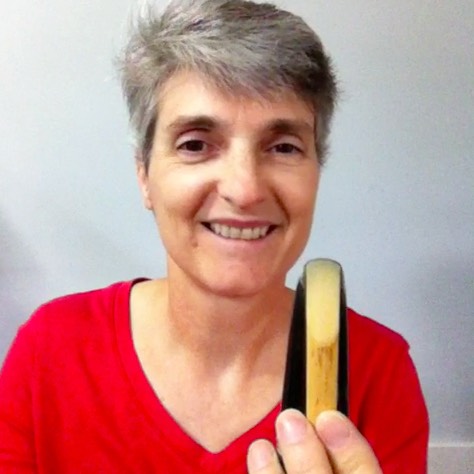
 4. Soak The Reed
 4. Soak The Reed
Before you can play the clarinet, you must soak the reed. The reed is a piece of cane (stiff plant material) that has been cut with a flat edge on the tip. Put the flat end of the reed in your mouth and let it absorb your saliva.
Don’t bite the reed as shown in the photo above left. Gently moisten the reed in your mouth.
Reeds need to be wet in order to vibrate and produce a good sound. Played dry, reeds will often produce high-pitched squeaks.

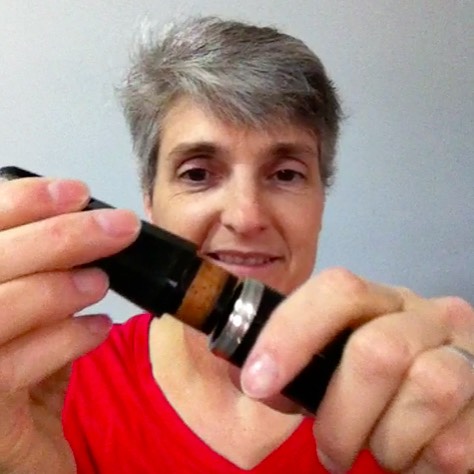
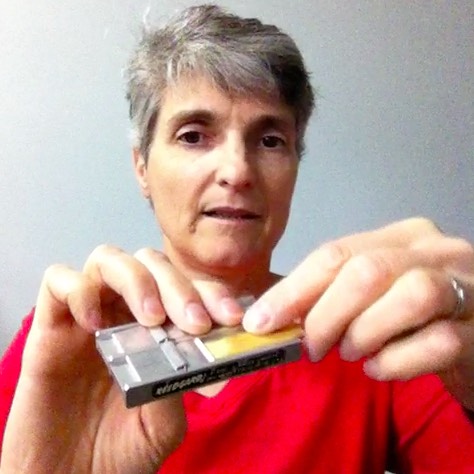
5. “Lip Balm” for your clarinet
Cork Grease comes in a tube applicator that looks like a tube of lip balm. If the cork on the mouthpiece is dry, apply some cork grease to the cork and then rub it in with your fingers.
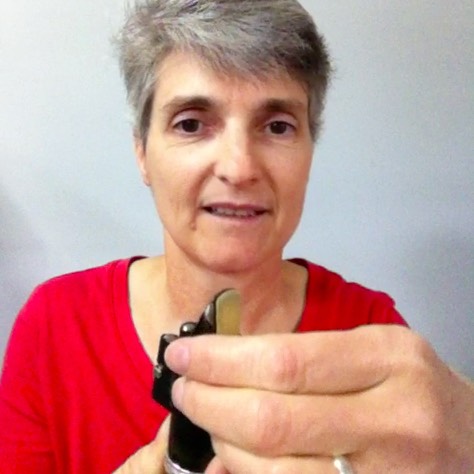
6. Partially Assemble
Find the barrel and mouthpiece in your clarinet case. Note that the barrel is wider at one end. The wide end is the bottom. (Yes, btw, you still have the reed soaking in your mouth.)
Hold the barrel wide end at the bottom and insert the mouthpiece cork end into the top of the barrel.
7. Adding the Reed
Notice that the reed has a curved side and a flat side. Lay the flat side of the reed against the flat side of the mouthpiece.
Line up the sides of the reed evenly with the mouthpiece. Adjust the reed tip up or down to make it even with the tip of the mouthpiece.
8. Ligature ties them Together
Like the barrel, the ligature has a wide end and a narrow end. The wide end is the bottom.
While holding the reed on the mouthpiece/barrel, slide the ligature (wide end at the bottom) over the reed.
Keep sliding the ligature down until it is snug and sitting midway on the fat part of the mouthpiece. Tighten the screws to hold the reed in place.

9. Embouchure – The What-A-Sure?
Embouchure is how the mouth connects to the clarinet. You’ll be using your lips, teeth, and mouth muscles to form the embouchure.
Like so: Fold a little bit of each lip over your teeth. Pull the corners of your mouth back like a forced smile.
If you look in a mirror, you’ll see your top lip is straight and your bottom lip has a small upward curve.
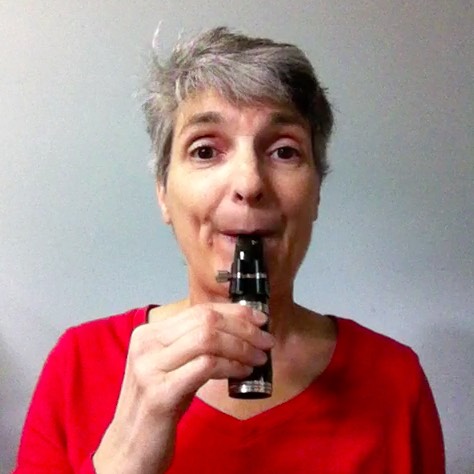
10. Wind instruments need Air
The clarinet is a wind instrument. This means it requires your breath to produce a sound.
Hold the mouthpiece/barrel combo with one hand on the barrel. Make sure you don’t cover the end hole of the barrel with your fingers!
Put the tip of the clarinet mouthpiece in your mouth. Form your embouchure as shown in step 9. Blow gently and firmly.
11. Your first Note
If you are blowing a steady airstream into the mouthpiece/barrel combo, you will hear this pitch: F#. Make sure you are supporting your breath with the muscles in your abdomen.
12. What’s that Muscle?
When you blow up a balloon, the stretchy rubber of the balloon requires strong blowing to stretch the balloon and fill it with air.
When you are blowing really hard on a balloon (or a clarinet!), you are using the diaphragm. That’s the muscle in your abdomen.
13. Steady Air makes Steady Tone
Now that you’ve produced a sound on your mpc/barrel, the next step is to smooth it out. Blow the tone again and hold it out for as long as you have air.
Listen to your sound. Is it smooth and constant? Is it wavering up and down in pitch? Is the pitch holding steady or does it change?
14. Cleaning and Putting it Away
When your finished practicing for the day, always clean and put away your reed and clarinet.
Remove the reed by loosening the screws of the ligature. Slide the reed up and off the mouthpiece.
Use a clean cotton cloth like an old handkerchief to wipe the excess moisture off the back of the reed. Be gentle with the reed especially the thin tip part of the reed. Chipped or broken reeds do not play well.
Store your damp reed flat in a reed guard. It will dry flat and be easier to play next time. Reeds that dry wavy are harder to play on.
Separate the mouthpiece from the barrel. Use your cotton cloth to dry out both pieces.
Put everything back in your clarinet case until tomorrow’s practice.
15. Homework
Practice putting together and playing on the mouthpiece/barrel combo for the next few days. Practice playing with a steady tone.
When you can produce a steady F# consistently and hold it for at least 5 seconds, you are ready for Mini Lesson #2.
All The Mini Lessons: How to Play the Clarinet Part 1 • How to Play the Clarinet Part 2 • How to Play the Clarinet Part 3 • How to Play the Clarinet Part 4
(c) Copyright 2014 Mary Ellen Grace. All Rights Reserved.


[…] How to Play the Clarinet Part 1 • How to Play the Clarinet Part 2 • How to Play the Clarinet Part 3 • How to Play the Clarinet Part 4 […]
[…] The Mini Lessons: How to Play the Clarinet Part 1 • How to Play the Clarinet Part 2 • How to Play the Clarinet Part 3 • How to Play the […]
[…] The Mini Lessons: How to Play the Clarinet Part 1 • How to Play the Clarinet Part 2 • How to Play the Clarinet Part 3 • How to Play the […]