Saxophone & Clarinet Lessons 503.888.5796
How To Play Clarinet Part 2
Learn how to separate pitches with articulation and learn some strengthening exercises for your mouth muscles in part 2 of How To Play Clarinet.
This is the second mini-lessons in a four-part series on how to play the clarinet. These 4 mini-lessons cover the following important information:
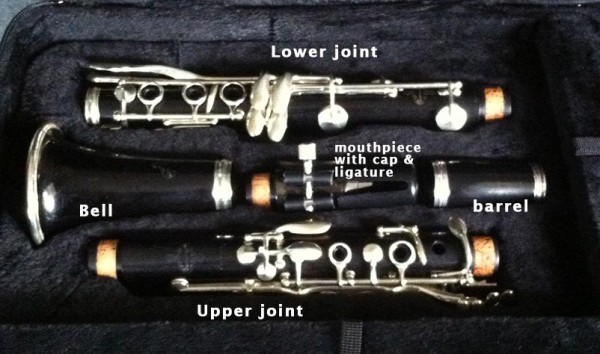
1. Parts of the clarinet, the reed, playing on the mouthpiece and barrel combo, the embouchure, breath support, and reed care
2. Embouchure review, lip push-ups, tonguing, mouthpiece/barrel combo, mouthpiece only, blowing F# and high C
3. The rest of the clarinet pieces, how to assemble, how to hold, clarinet push-ups, cleaning and storing
4. First notes on the completely-assembled clarinet, finger positions, how to read fingering charts, clarinet accessories (swab, cotton cloth, reed guard, cork grease)
All The Mini Lessons: How to Play the Clarinet Part 1 • How to Play the Clarinet Part 2 • How to Play the Clarinet Part 3 • How to Play the Clarinet Part 4
Mini Lesson #2 How to play clarinet: Lip Push-ups and Articulation
Congratulations on completing Part 1 of the mini-lesson on How To Play The Clarinet!
Now you have produced your first sounds on the clarinet mouthpiece and barrel combination. You can identify the parts of the clarinet.
You have learned how to soak your reed and assemble the mouthpiece and barrel. You know how to apply cork grease as well as clean out the mouthpiece after you have played on it.
Embouchure Review
Time for a short review of forming the clarinet embouchure. Fold a small amount of both the upper and lower lips over your upper and lower teeth. Press your lips firmly to the mouthpiece, taking in about 1/4 of the ‘beak’ part of the mouthpiece into your mouth.
Pull the corners of your mouth back as in a smile. This forces the chin to flatten and point downward.
Saying “TA” separates the notes

We use the tongue to separate tones from one another. Say “TA” and pay attention to where your tongue touches in your mouth. Say “TA” again and this time pay attention to when the tongue moves off your mouth.
The sound “TA” does not get produced until your tongue moves off the roof of your mouth (or back of your teeth). Now, while you are holding your chin so it doesn’t move, and looking in a mirror for immediate feedback, say “TA – TA – TA – TA”.
The idea here is to feel the movement of your tongue separate from the movement of your mouth. As a matter of fact, the rest of your mouth shouldn’t be moving.
Practice “TA”

Assemble the mouthpiece, reed and barrel combination. Practice tonguing by blowing into the mouthpiece and saying “TA”. Repeat until your chin does not move when you articulate the tone (“TA”).
If you find it a challenge to produce a clear articulated tone, try this: Set your mouth in proper embouchure position on the mouthpiece. Place the tip of your tongue lightly on the reed. Blow through the mouthpiece and then lift your tongue off the reed to start the tone sounding.
From F# to High C
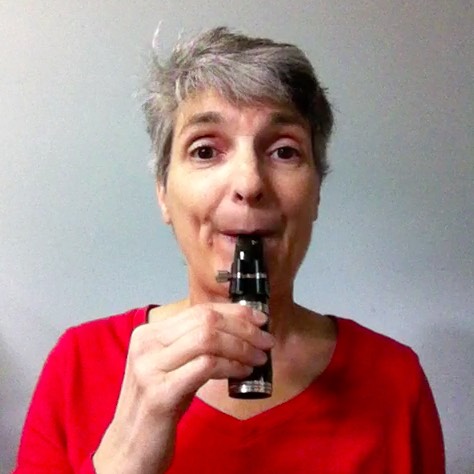
If your clarinet embouchure is properly formed and you are directing good steady air into the mouthpiece/barrel combo, the pitch you are playing is F#.
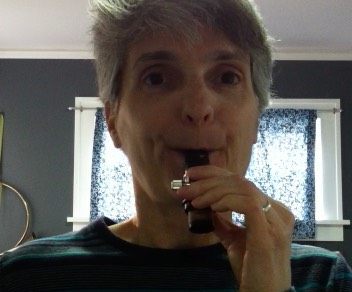
Remove the barrel and blow into just the mouthpiece. The pitch you should hear now is a high C, which is a diminished twelfth (a large interval or distance) above the F#.
If you have access to a piano, play just the mouthpiece and also the mouthpiece/barrel combo along with the piano and match the pitch.
You can tell if you are tightening your corners firmly enough and/or putting enough supported breath into the clarinet when the pitch on the clarinet matches the pitch on the piano.
No Piano?
If you don’t have a piano, visit VirtualPiano.Net online. Tap any piano key with your cursor and that particular pitch sounds.
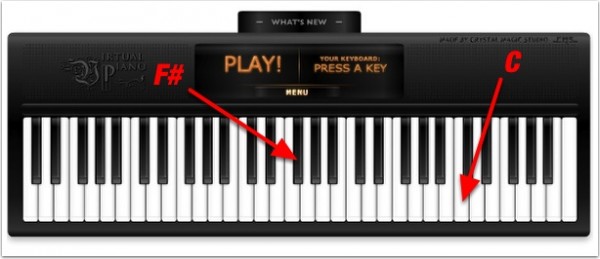
When a key is tapped, VirtualPiano identifies the pitch name in the box above the keyboard. You don’t have to know the pitch name of each key. In this photo, I’ve labeled F# and C for you.
Getting Tired?
When you first begin to play any wind instrument, your mouth will get tired. You aren’t used to tightening your mouth muscles for extended periods of time. That’s why we have Lip Push-Ups.
Lip Push-ups
No, I don’t want you to drop and give me twenty! A Lip Push-up is an exercise for strengthening the muscles of your mouth.

Purse your lips forward as if you were to whistle. Then pull the corners of your mouth back in a great big smile.
Repeat this motion forward and back at least 50 times.
You can do these away from your clarinet. You may feel silly doing them. If that’s the case, do them at night when no one can see you. Perhaps when you get ready for bed might be a good time.
Homework
- Practice tonguing until you can cleanly play twelve (12) tones at a tempo of one note per second. This tempo is also expressed as 60 beats per minute (60BPM).
- Practice playing an F# for 15 seconds of continuous steady tone. Play this on the mouthpiece and barrel combo.
- Practice playing a high C for 15 seconds of continuous steady tone. Play this on just the mouthpiece alone.
When you have accomplished these goals, you will be ready for Mini Lesson #3 in How To Play The Clarinet.
All The Mini Lessons: How to Play the Clarinet Part 1 • How to Play the Clarinet Part 2 • How to Play the Clarinet Part 3 • How to Play the Clarinet Part 4
(c) Copyright 2014 Mary Ellen Grace. All Rights Reserved.


[…] When you can produce a steady F# consistently and hold it for at least 5 seconds, you are ready for Mini Lesson #2. […]
[…] to Play the Clarinet Part 1 • How to Play the Clarinet Part 2 • How to Play the Clarinet Part 3 • How to Play the Clarinet Part […]
[…] The Mini Lessons: How to Play the Clarinet Part 1 • How to Play the Clarinet Part 2 • How to Play the Clarinet Part 3 • How to Play the Clarinet Part […]